
How to Back Up Your iPhone (iCloud and Computer)
Backing up your iPhone protects your photos, messages, settings and app data if your phone is lost, damaged or replaced. Follow simple steps to back up with iCloud, a Mac or a Windows PC.
Note: the pictures in this guide are AI-generated illustrations to show the steps. They are not screenshots from a real phone.
Key Takeaways
- iCloud backs up automatically on Wi-Fi; a computer gives you a copy you keep yourself
- Tick Encrypt local backup to include Health and Activity data, and write the password down
- A backup only copies your data and deletes nothing
- Check the date of the last backup to be sure it worked
AI-generated illustration
Backing up your iPhone protects your photos, messages, settings and app data if your phone is lost, damaged or replaced. This guide shows how to back up with iCloud, a Mac or a Windows PC.
Tap any picture in this guide to zoom.
Before You Start
- Plug in your iPhone or make sure the battery is well charged.
- For iCloud: connect to Wi-Fi and check that you have enough iCloud storage.
- For a computer: have a working USB cable and your iPhone passcode ready.
Method 1: Back Up with iCloud
Step 1: Connect to Wi-Fi
Connect your iPhone to a Wi-Fi network.
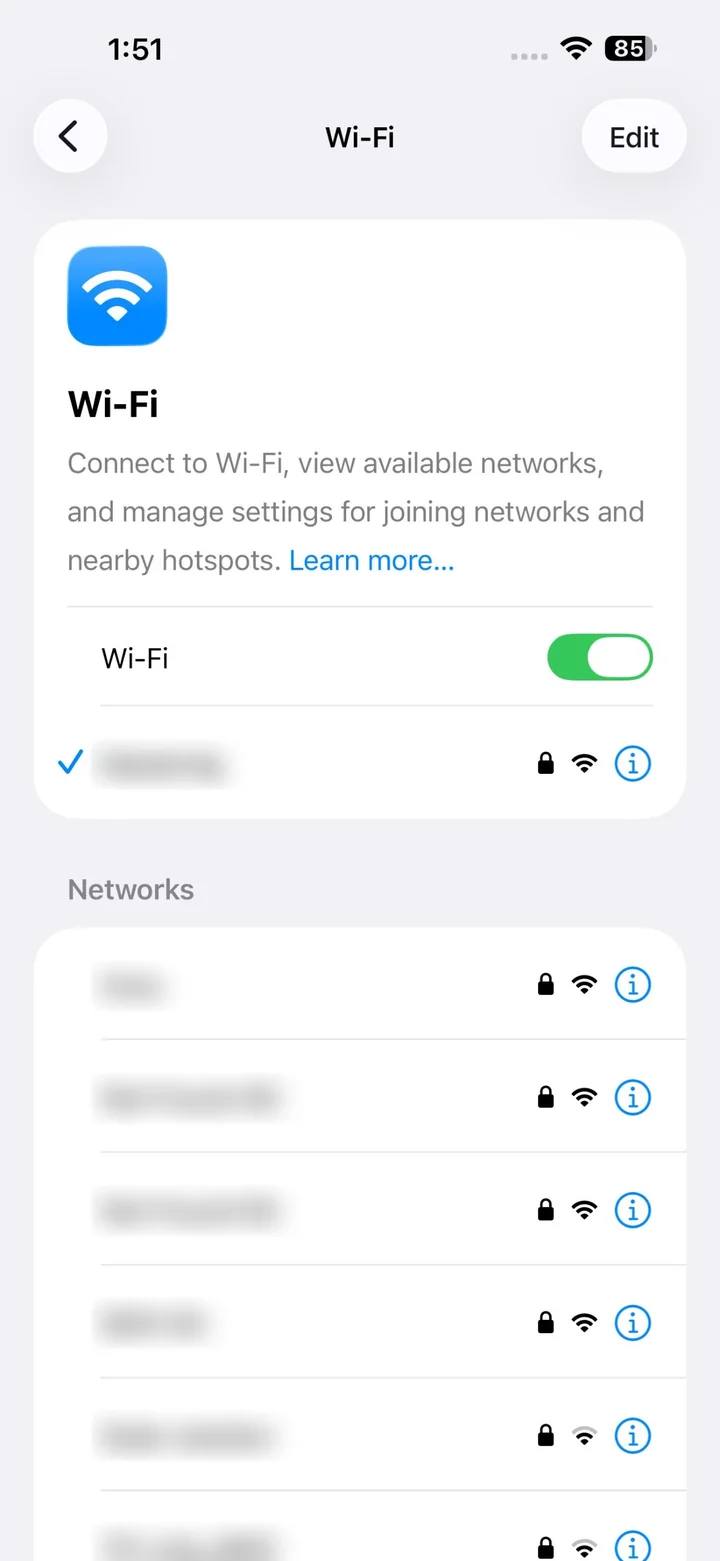
Real iPhone screenshot (iOS 27), taken by MobiCircuit
Step 2: Open Settings and tap your name
Open Settings and tap your name at the top, then tap iCloud.

Real iPhone screenshot (iOS 27), taken by MobiCircuit

AI-generated illustration
Step 3: Tap iCloud Backup
On the iCloud screen, tap iCloud Backup.
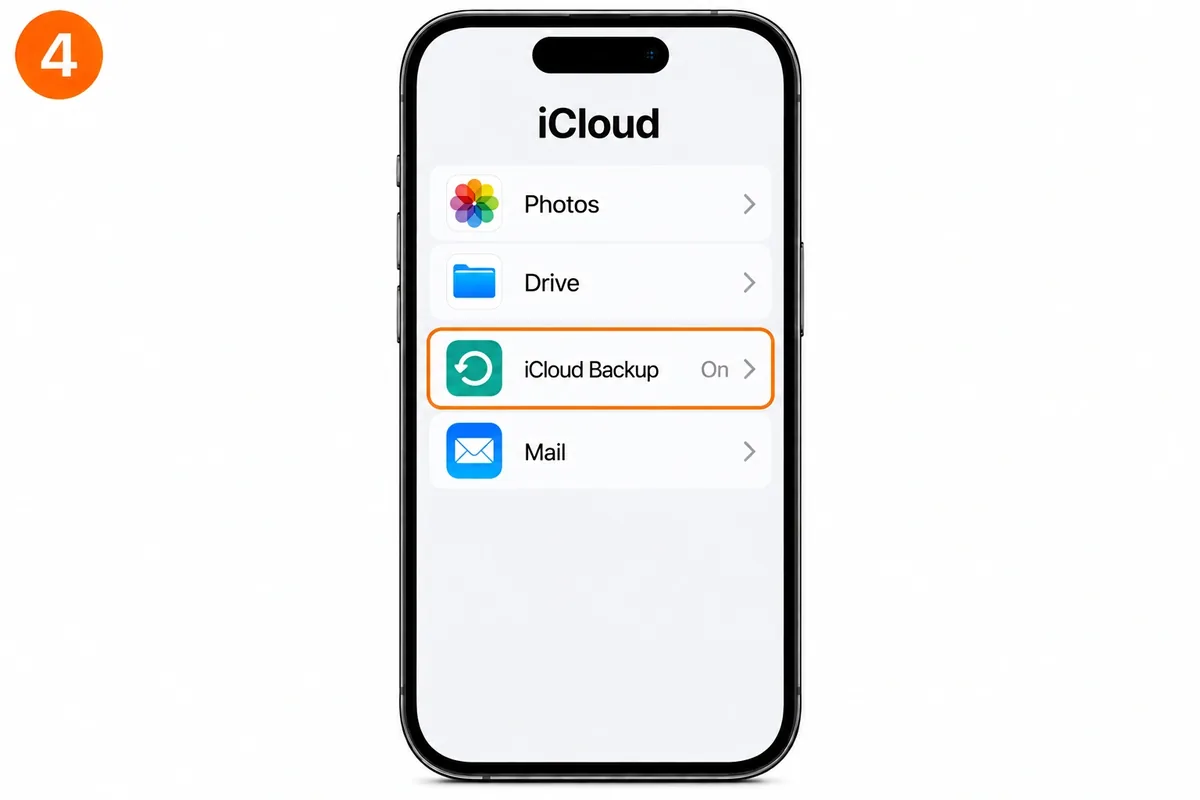
AI-generated illustration
Step 4: Turn on Back Up This iPhone
Make sure Back Up This iPhone is on. Your iPhone then backs up on its own when it is plugged in, connected to Wi-Fi and the screen is locked.
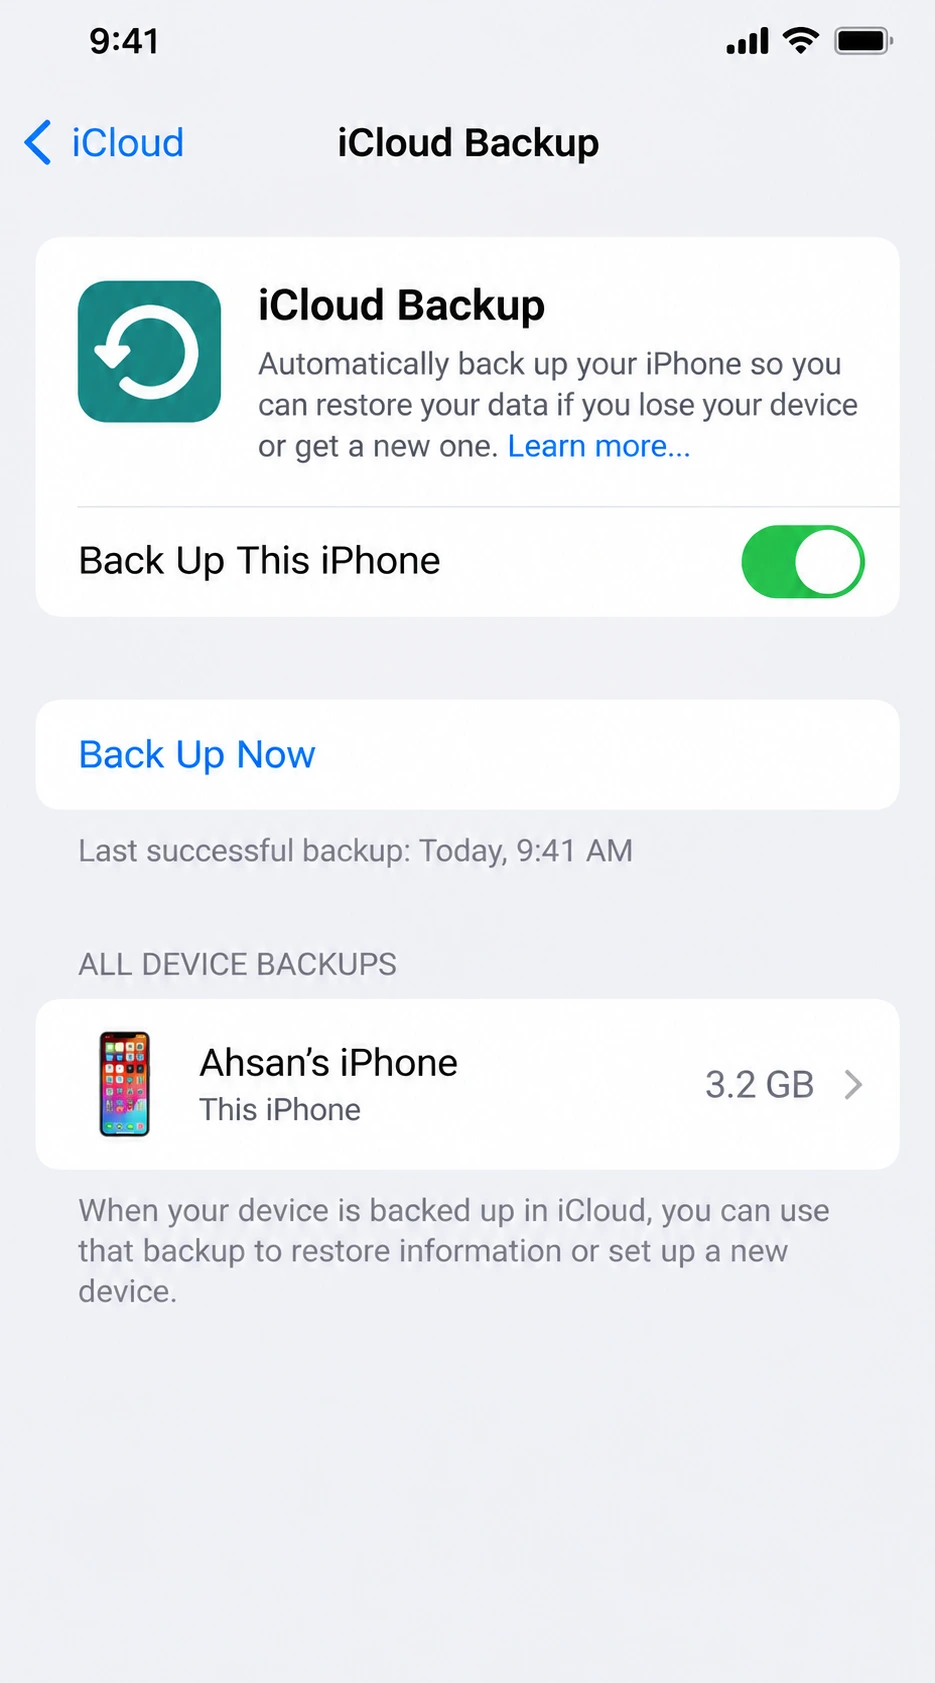
Real iPhone screenshot (iOS 27), taken by MobiCircuit
Step 5: Back up right now
To back up right away, tap Back Up Now and stay connected to Wi-Fi until it finishes.
Real iPhone screenshot (iOS 27), taken by MobiCircuit
Method 2: Back Up with a Mac (Finder)
Step 1: Connect your iPhone
Connect your iPhone to your Mac with a cable. If asked, allow the accessory to connect, then tap Trust on your iPhone and enter your passcode.
Step 2: Select your iPhone in Finder
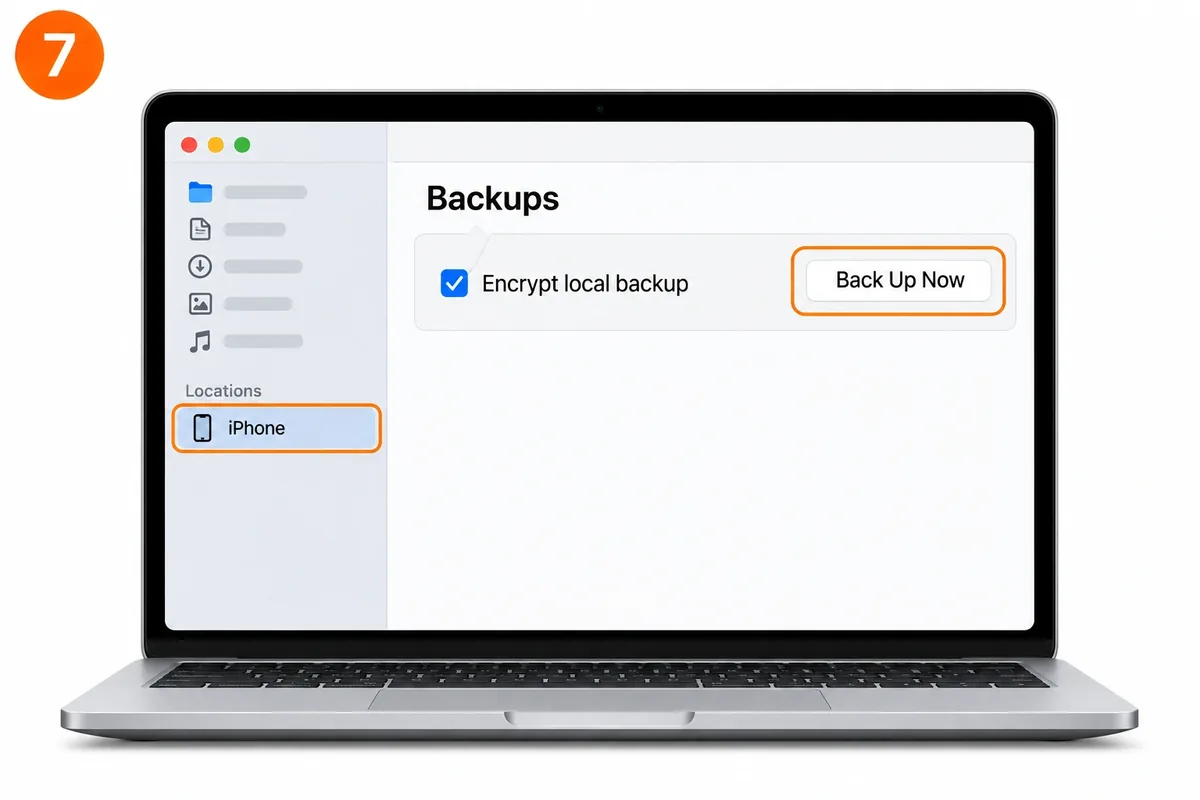
Open Finder and select your iPhone in the sidebar.
AI-generated illustration
Step 3: Encrypt the backup (optional)
To save Health and Activity data, tick Encrypt local backup, create a password and click Set Password. Write the password down: the backup cannot be recovered without it.
Step 4: Click Back Up Now
Click Back Up Now and wait until it finishes.
Method 3: Back Up with a Windows PC
Using the Apple Devices app:
Step 1: Connect your iPhone
Connect your iPhone with a cable. If asked, enter your passcode and approve the computer.
Step 2: Select your iPhone and open General
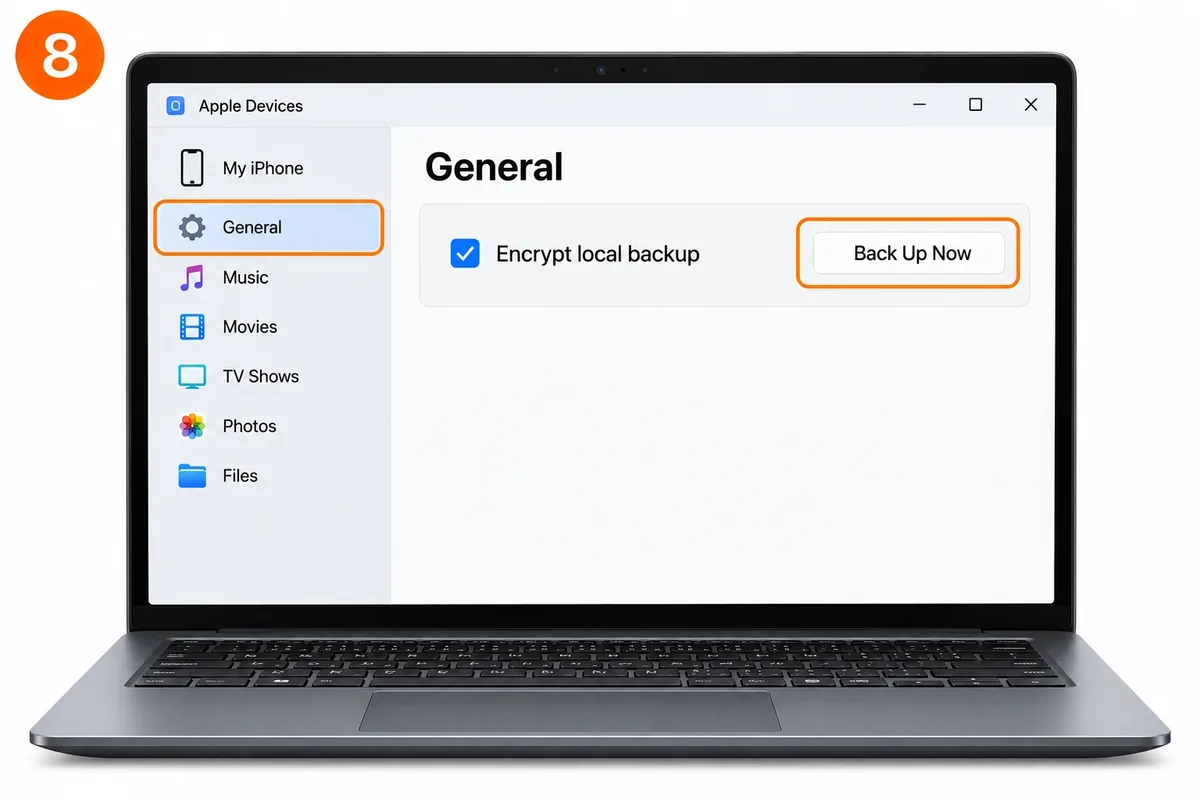
Select your iPhone in the app, then click General.
AI-generated illustration
Step 3: Encrypt the backup (optional)
To save Health and Activity data, tick Encrypt local backup and create a password you will remember.
Step 4: Click Back Up Now
Click Back Up Now.
Using iTunes: connect your iPhone, click the iPhone icon, click Summary, use the same encryption step, then click Back Up Now.
How to Check That It Worked
- iCloud: go to Settings > your name > iCloud > iCloud Backup. The date and time of your last backup show under Back Up Now.
- Mac, Apple Devices and iTunes: the date and time of the last backup show in the window.
Frequently Asked Questions (FAQs)
1. Is iCloud Backup free?
Apple gives 5 GB of free iCloud storage. If you need more space, you need a paid iCloud+ plan.
2. Can I back up without Wi-Fi?
Yes. Use a Mac or a Windows PC with a USB cable.
3. How long does a backup take?
It depends on how much data you have and how fast your connection or computer is.
4. Does a backup delete anything on my iPhone?
No. A backup only makes a copy of your data.
5. Can I restore a backup on a new iPhone?
Yes. When you set up the new iPhone, you can choose to restore from a backup.
Final Thoughts
Back up regularly: iCloud for automatic backups, and a computer for a copy you keep yourself.
Related MobiCircuit Guides
Sources for technical verification: Apple Support: Back up your iPhone with iCloud, Apple Support: Back up your iPhone on Mac, Apple Support: Back up your iPhone on Windows.
Editorial note: iOS menu names and appearance can change between software versions. Last checked: October 2026.